Paper Maché Plate
Art and Craft Projects for Kids
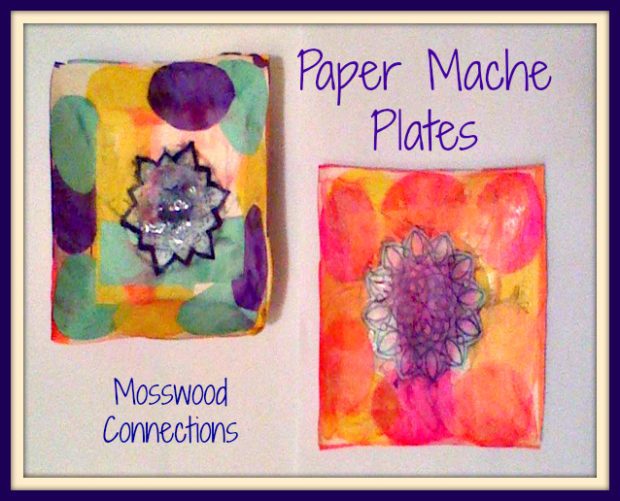
PAPER MACHE PLATES: AN EASY DIY GIFT
Many years ago, I traveled to Korea to help a client set up an educational program for their son on the autism spectrum. They had just moved back to Seoul so they were lacking toys for their boy. I volunteered to go shopping and pick up some toys and supplies. The boy and his nanny came to the mall with me. As we passed a store, the nanny, who spoke very little English, indicated that we should go in. The store sold a variety of Hanji paper crafts. She carefully watched my face as we walked through the store, just as we were about to leave she picked up a pressed paper maché plate and asked if I liked it. I nodded and she brought it the clerk, paid for it and handed it to me with a smile.

PAPER MACHÉ PLATES: AN EASY DIY GIFT
Now this paper maché plate was not expensive, maybe $5.00 U.S. but to me it was priceless. This woman had raised her two sons in one room that they rented in a house. She did not have a lot of money, by giving me that plate she was showing that she valued me and what I did for a child that she loves. As we near the holiday, I have been thinking about handmade gifts. I look at the paper maché plate she gave me every day and I realized that homemade paper maché plates make great gifts. Press some love into the paper as you make it for someone in your life.

Paper Mache Plates An Easy DIY Gift
Materials You Need to Make a Paper Maché Plate:
- Pictures for the Center of the paper maché plates; we printed out some mandalas. (Optional)
- Colored Paper; Tissue paper works great but any lightweight paper will do.
- Mod Podge or watered down glue
- Sponge Brush
- Plastic Wrap
- Plates
Instructions for making Your Paper Maché Plate DIY Gift:
- Tightly wrap the plates with plastic wrap. Make sure that the plastic wrap folds over the edge of the plate. Place the plates upside down on an object so the edges are away from any surface.
- Cut out the picture you want to put in the center.
- Cut out strips and shapes from the colored paper.
- Lay the paper into the container where you poured the mod podge or watered down glue.
- Layer the paper onto the upside down plates. Remember the first layer is what you will see when the plate is turned over. Use the sponge brush to cover and coat the paper while smoothing out any wrinkles or bumps. Apply at least 2-3 layers.
- Allow the paper maché plates to dry thoroughly, preferably overnight. Once the paper maché plates are completely dry carefully peel off the plastic wrap.
- Trim the edges if necessary.

Paperclip Painting Art Activity; Painting With Found Objects

Books that Teach About Diversity
